Step-by-Step Guide to Installing a Fence
Posted by Ayokunle Ademola-John on
Installing a fence can transform your property by providing security, privacy, and aesthetic appeal. Whether you’re enclosing a garden, creating a safe space for pets, or marking property boundaries, this step-by-step guide will walk you through the installation process for a durable and professional-looking fence.
Step 1: Plan Your Fence
Before diving into the installation, take time to carefully plan your project.
Key Considerations:
- Purpose: Define the fence's main purpose—security, aesthetics, or containment.
- Materials: Choose between vinyl-coated wire, galvanized wire, woven wire, or welded wire fencing based on durability and application.
- Regulations: Check local zoning laws and property lines to ensure compliance with height, style, and placement requirements.
- Tools Needed: Gather essentials like a post-hole digger, level, measuring tape, and staples.
Step 2: Measure and Mark Your Fence Line
Accurate measurements are critical for a smooth installation.
- Outline the Area: Use stakes and string to mark where your fence will go.
- Measure the Distance: Calculate the total length and determine how many posts you’ll need.
- Mark Post Locations: Space posts evenly, typically 6-8 feet apart. Adjust spacing for corners and gates.
Step 3: Choose and Prepare Your Materials
Select the right fencing material for your needs.
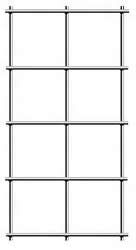
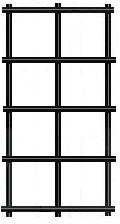
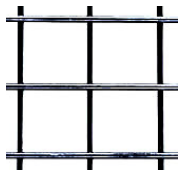
- Welded Wire Fencing: Ideal for sturdy, long-lasting installations. Check out our premium options here: Shop Welded Wire Fence.
- T-Posts or Wooden Posts: Choose durable materials that can withstand weather conditions.
Step 4: Install Fence Posts
The posts provide the foundation for your fence’s stability.
- Dig Holes: Use a post-hole digger to create holes at least 1/3 the length of the post. For added stability, consider using concrete.
- Set the Posts: Place the post into the hole and fill with concrete or compacted soil. Use a level to ensure the post is straight.
- Let the Concrete Cure: Allow 24-48 hours for the concrete to set before attaching fencing material.
Step 5: Attach the Fence Material
With the posts securely in place, you’re ready to attach your fence.
- Unroll the Fence: Lay out the fencing material along the line of posts.
- Secure to Posts: Start at one corner, attaching the fencing with staples, ties, or clips. Pull the material taut as you move to the next post.
- Tension Wire (if applicable): Use tension wire for extra support, especially with woven or welded wire fencing.
Step 6: Install Gates and Finishing Touches
No fence is complete without proper gates and a final inspection.
- Position the Gate: Install the gate according to the manufacturer's instructions, ensuring it swings freely and aligns with the rest of the fence.
- Add Additional Supports: Reinforce corners and gate posts for added durability.
- Inspect Your Work: Walk along the fence line to check for sagging, loose attachments, or uneven sections.
Step 7: Maintain Your Fence
Keep your fence in top condition with regular maintenance:
- Inspect Regularly: Check for rust, damage, or loose wires.
- Clean as Needed: Remove dirt and debris to prevent corrosion, especially with vinyl-coated fencing.
- Tighten and Repair: Address any sagging or broken sections promptly.
Tools and Materials Checklist
Here’s what you’ll need for a successful installation:
- Fencing material (rolls or panels)
- Fence posts (wooden or T-posts)
- Post-hole digger or auger
- Measuring tape and level
- Concrete or gravel
- Staples, clips, or ties
- Hammer and fencing pliers
Why Choose Louis Page for Your Fencing Needs?
At Louis Page, we offer a wide range of high-quality fencing materials tailored to your project. Whether you need heavy-duty welded wire or flexible woven wire, we’ve got you covered. Plus, our team is always here to provide expert advice.
📞 Call us at 978-486-3116 or visit Shop Welded Wire Fence to explore our products and get started on your project!
Conclusion
Installing a fence doesn’t have to be daunting. With proper planning, quality materials, and the right tools, you can achieve a durable and attractive fence that meets your needs. Follow this step-by-step guide, and enjoy the benefits of your new fence for years to come.
Share this post
- Tags: american made, deer fence, wire fence, wire mesh


